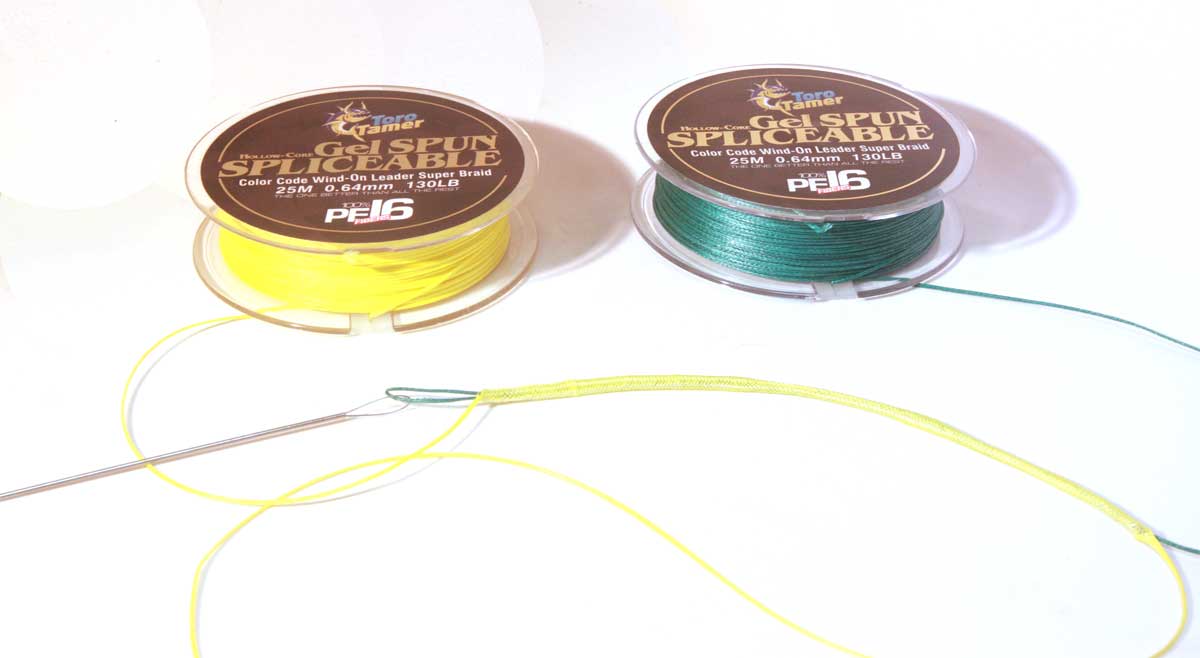
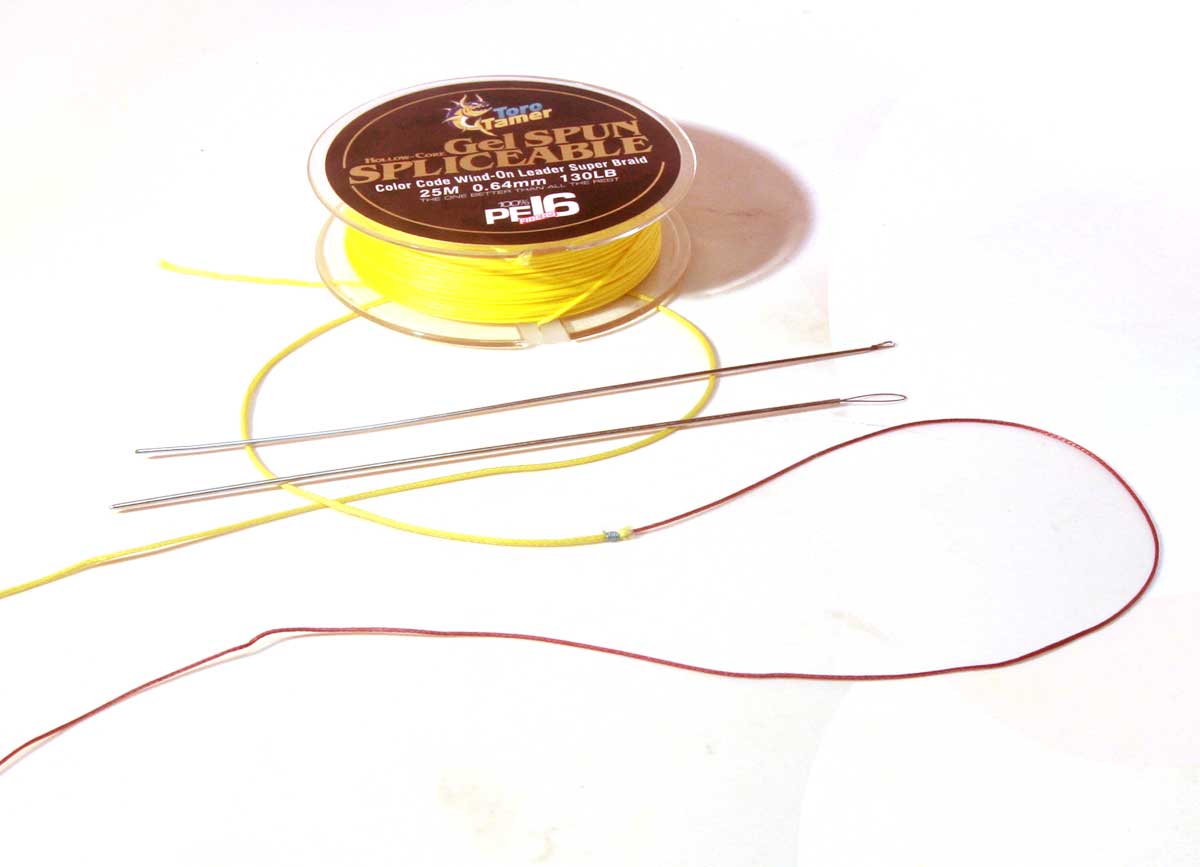
Hollow Needle
Required
For inserting your
leader into the braided
line, you will use a
hollow threading needle
matched to the line
diameter of your leader.
Insert the leader into
the hollow braid 36
inches or greater, I
recommend going up into
the braid 3-6 feet
(going further up for
your heavier rigs or
when connecting lighter
leader to heavier
braided lines). Then, at the
transition point of the
leader to braid you will
want to secure your line.
The hollow braid will
lock down onto the
leader, however if you
do not secure the
transition point you
will be able to move the
braid over the leader under slack lin,
even
pulling the leader out of
the braid. Under a tight
pull it won't come out,
but with more gentle
pressure it will. So,
there should be some
transition securement
made to prevent
slippage.
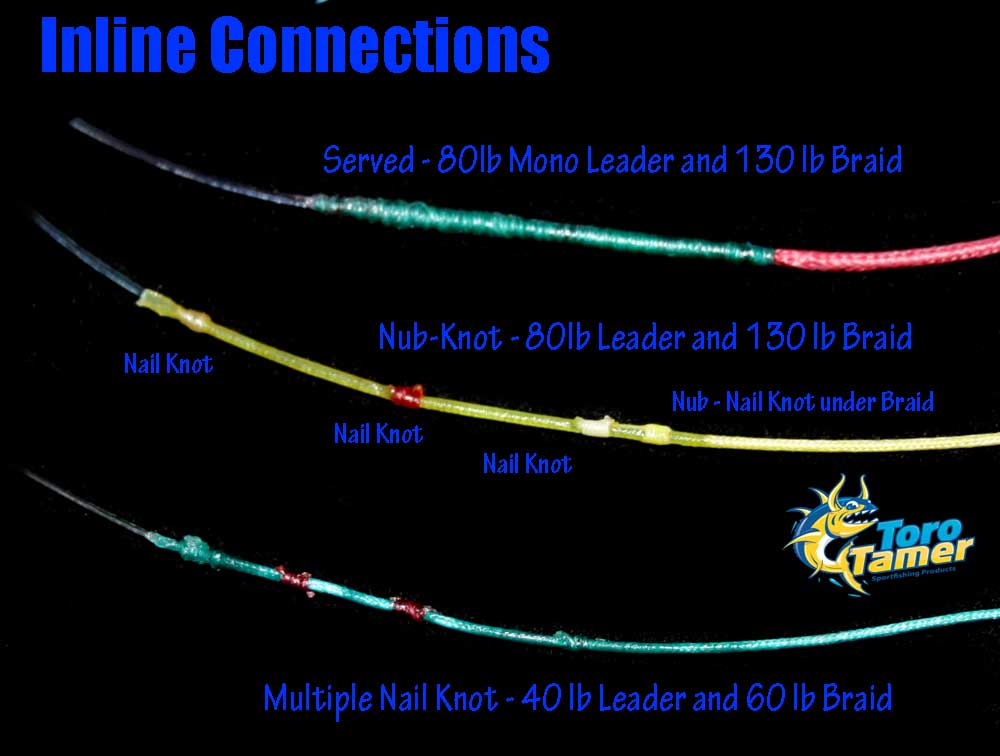
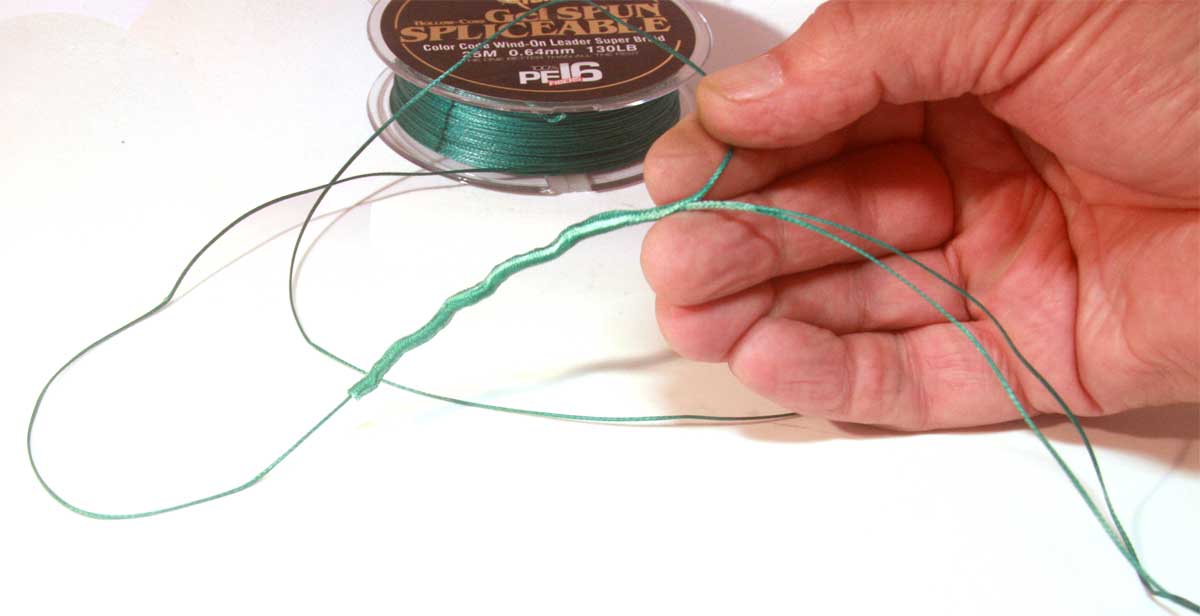
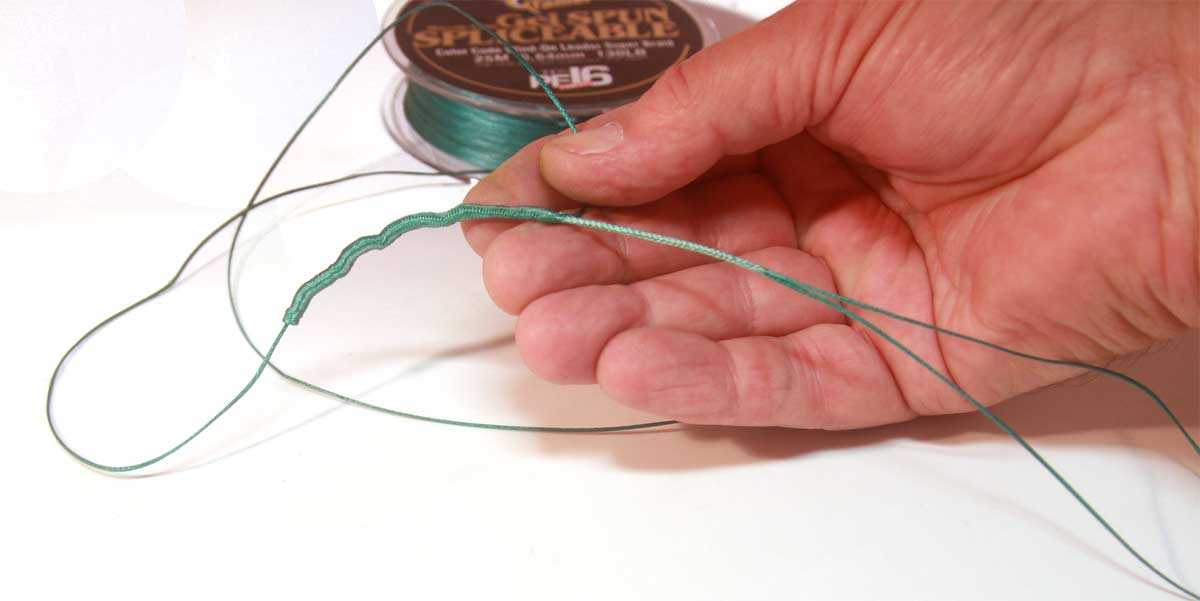
The transition
between braid and leader
needs to be secured.
That can be done with a
serve at that transition
point or one or more
nail knots plus an
adhesive. Alternatively
you could make several
overhand knots to secure
that point however
that's bulkier and not
as clean a connection as
the nails or serve. On
lighter tests simply
gluing this point is
adequate, though not
recommended for extended
use. I most often make
use of multiple nail
knots on leaders of 50
lb. test or less, and
use a serve at the
transition of heavier
leaders. Some anglers,
experienced long range
users most typically,
will use a "nub knot"
rather than the serve.
This transition
connection puts a nail
knot on the leader about
2 inches above the
transition of the two
lines. Then multiple
nail knots are used
between the "nub" which
is on the leader, over
the braid before the
leader.
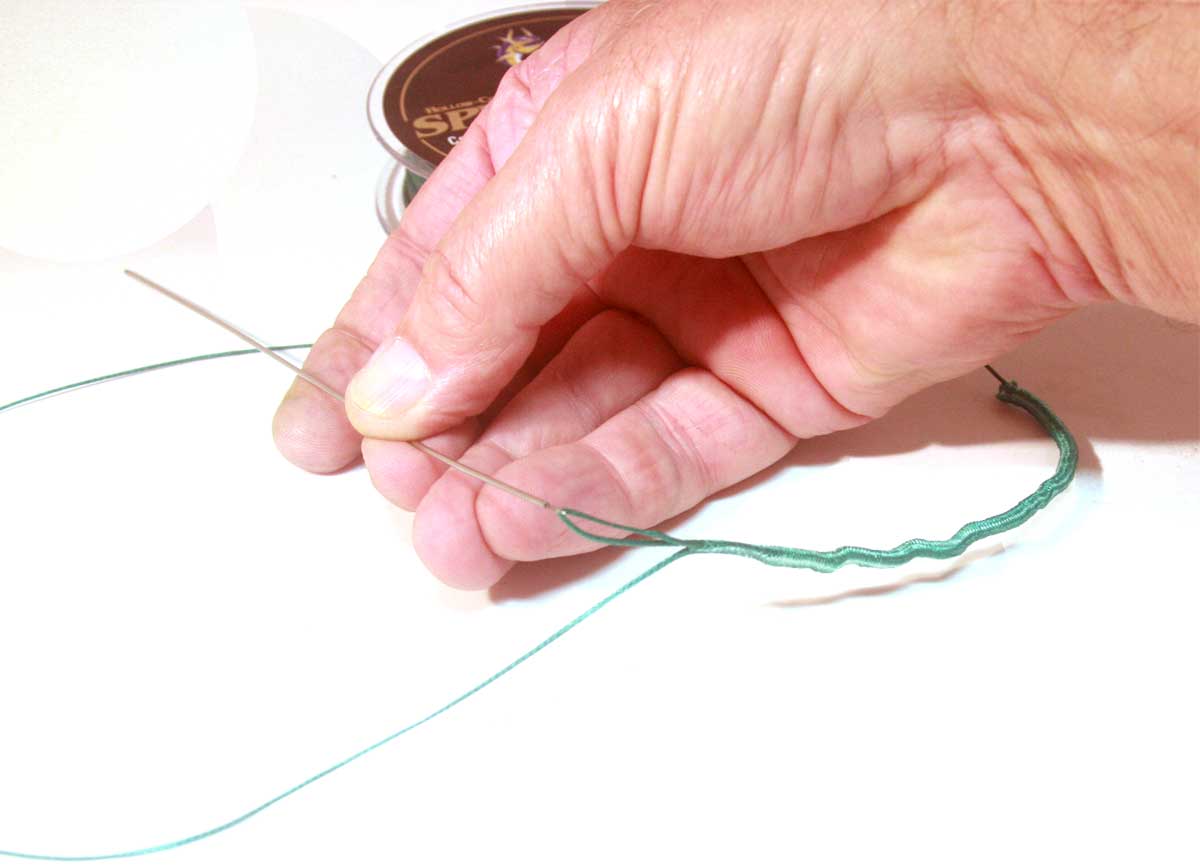
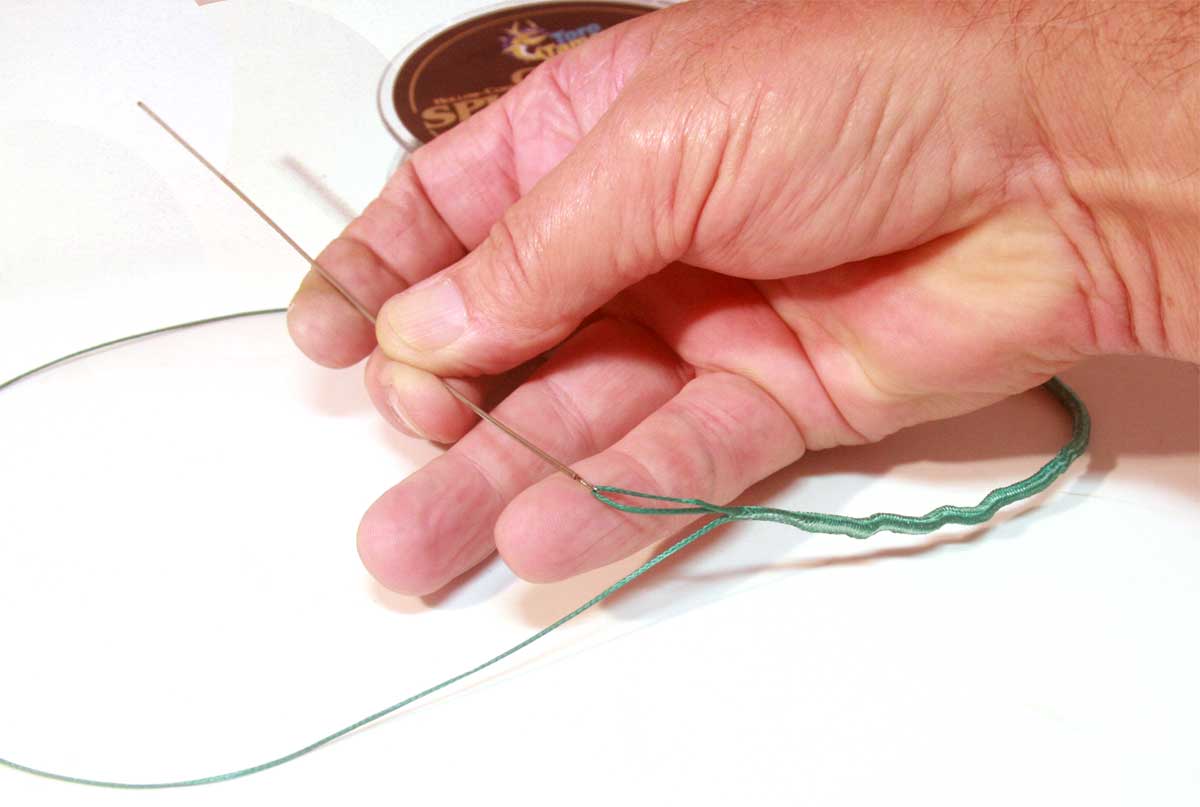
In the following video
we show how to make an in-line
connection using three nail knots
and a bit of our Toro Braid glue to
secure the transition point between
leader and braid, running the leader
inside the braid for 3 feet or so.
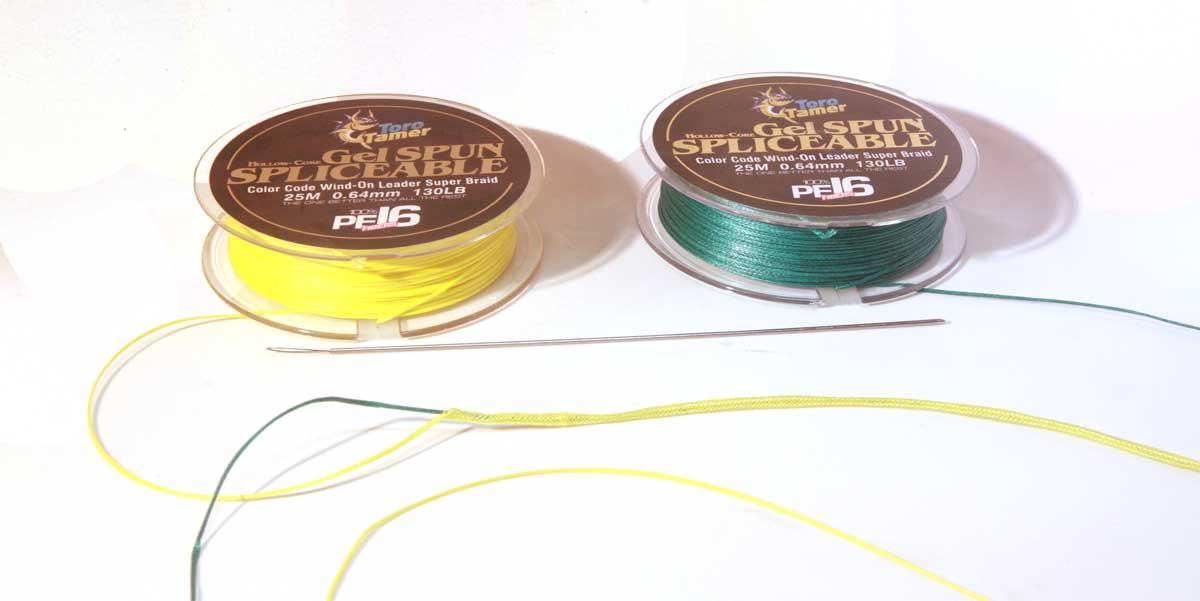
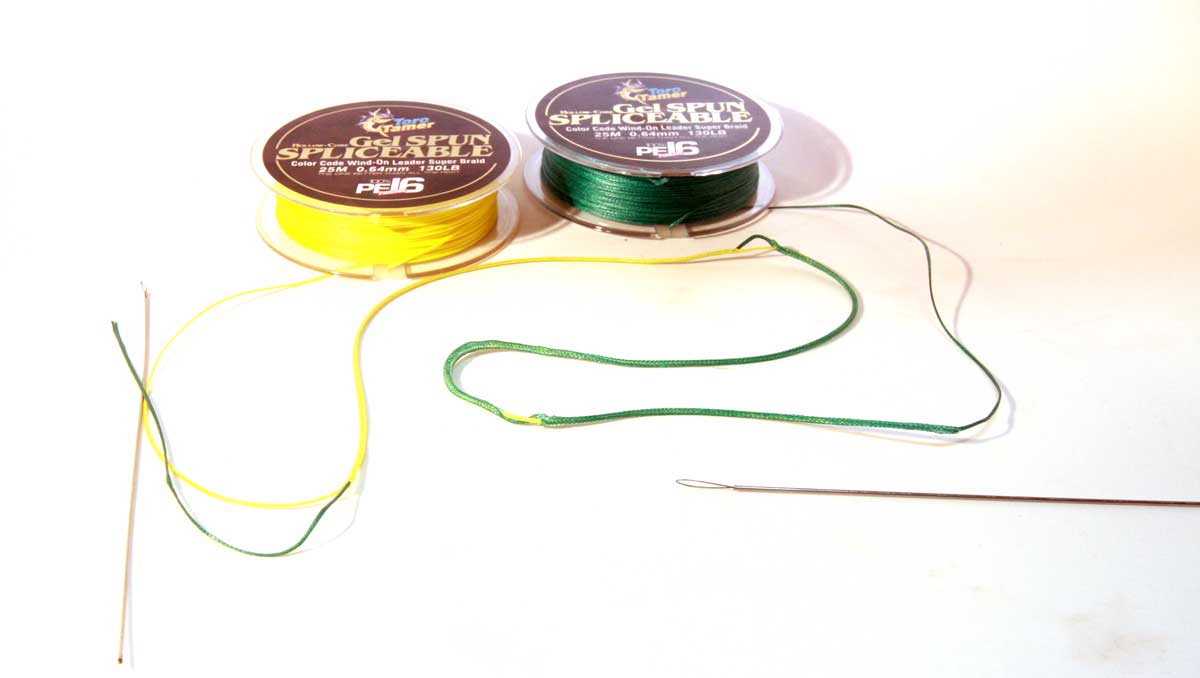
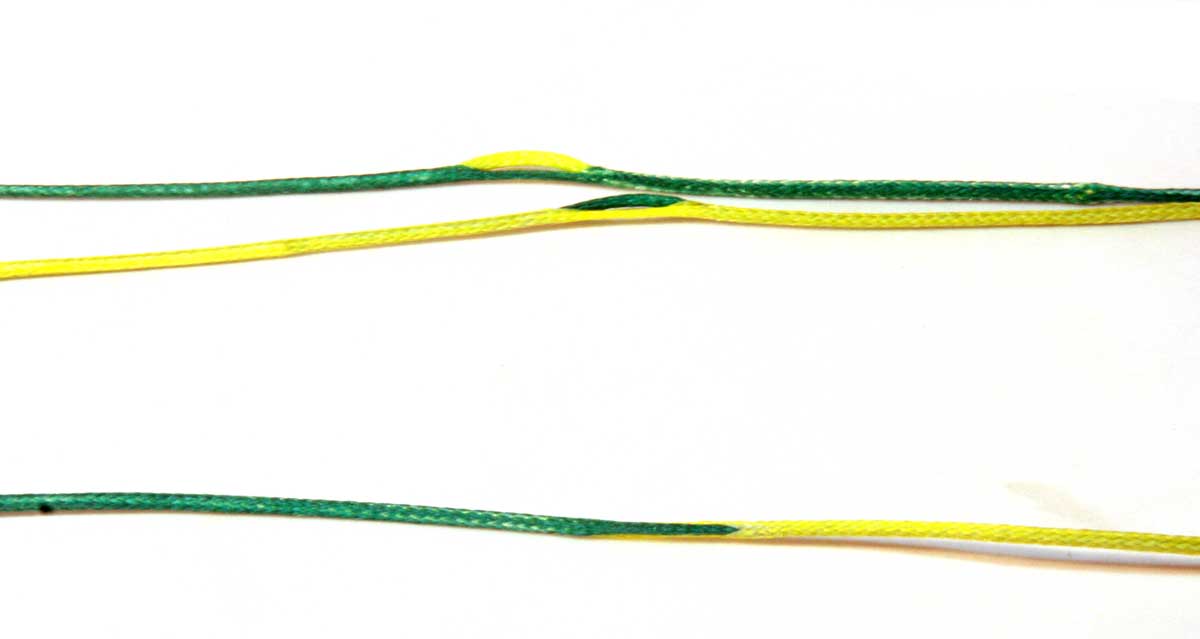
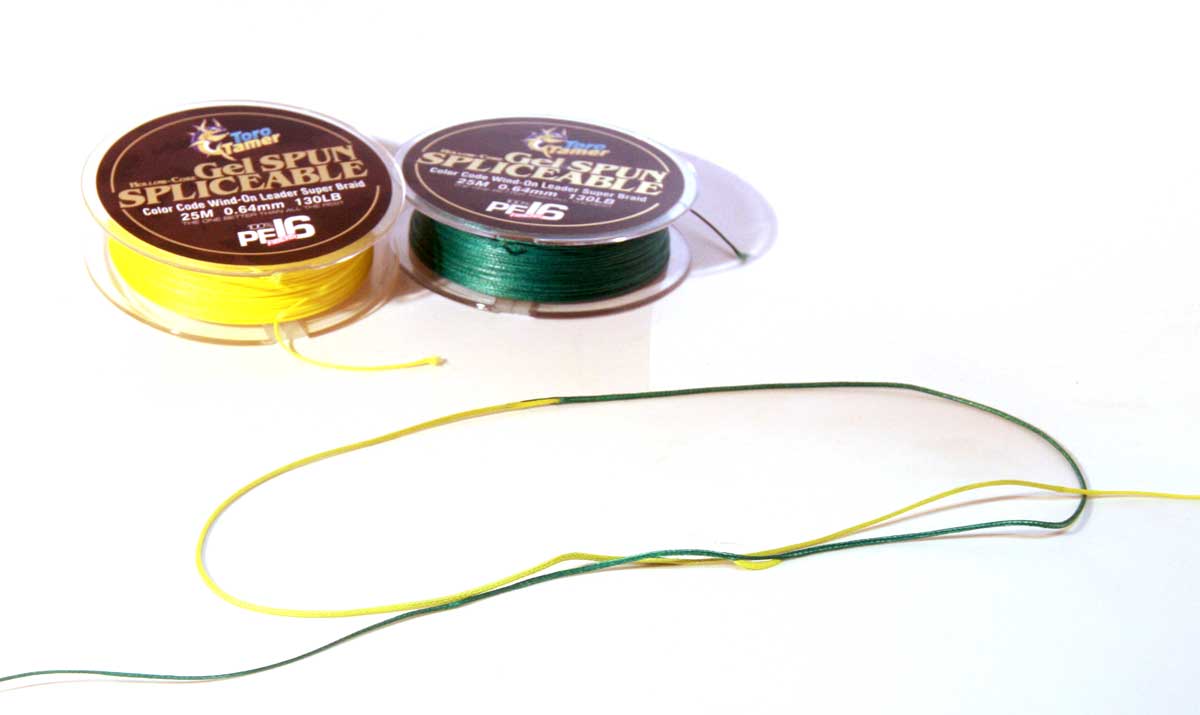
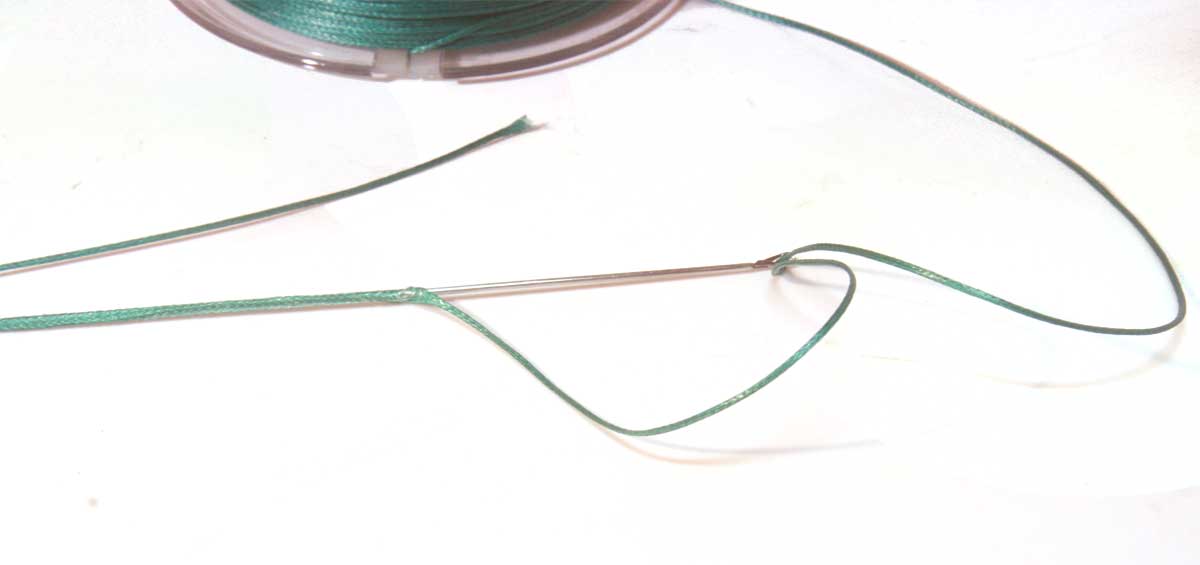
JOINING HOLLOW CORE LINES -
SPLICED CONNECTION BETWEEN LINES
Loop or Latch
Needle Required
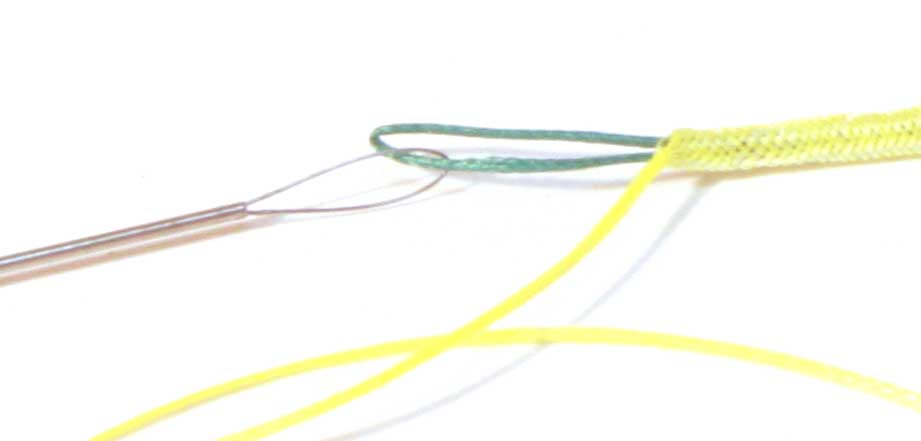
To join two hollow lines
together, you will
insert the end of each
line into the other
using either the loop or
latch needle. Most go
12-18 inches for each
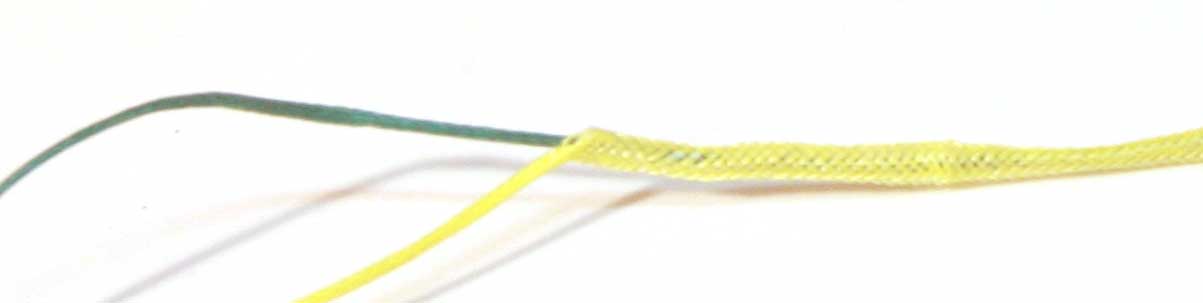
insertion. We'll start
with the darker green
line inserting the
needle about 12 inches
from the end of the
yellow line and pulling
the green line up into
the yellow braid and
then come back out of
the line approximately
24 inches up into the
yellow line away from
it's end. Using the tag
of the yellow line,
perform the same
insertion into the green
braid, again exiting the
yellow line after
insertion of about 12
inches. The tag end of
the yellow line should
be inserted into the
green line - locking
down the splice. Repeat
the same for the green
line.
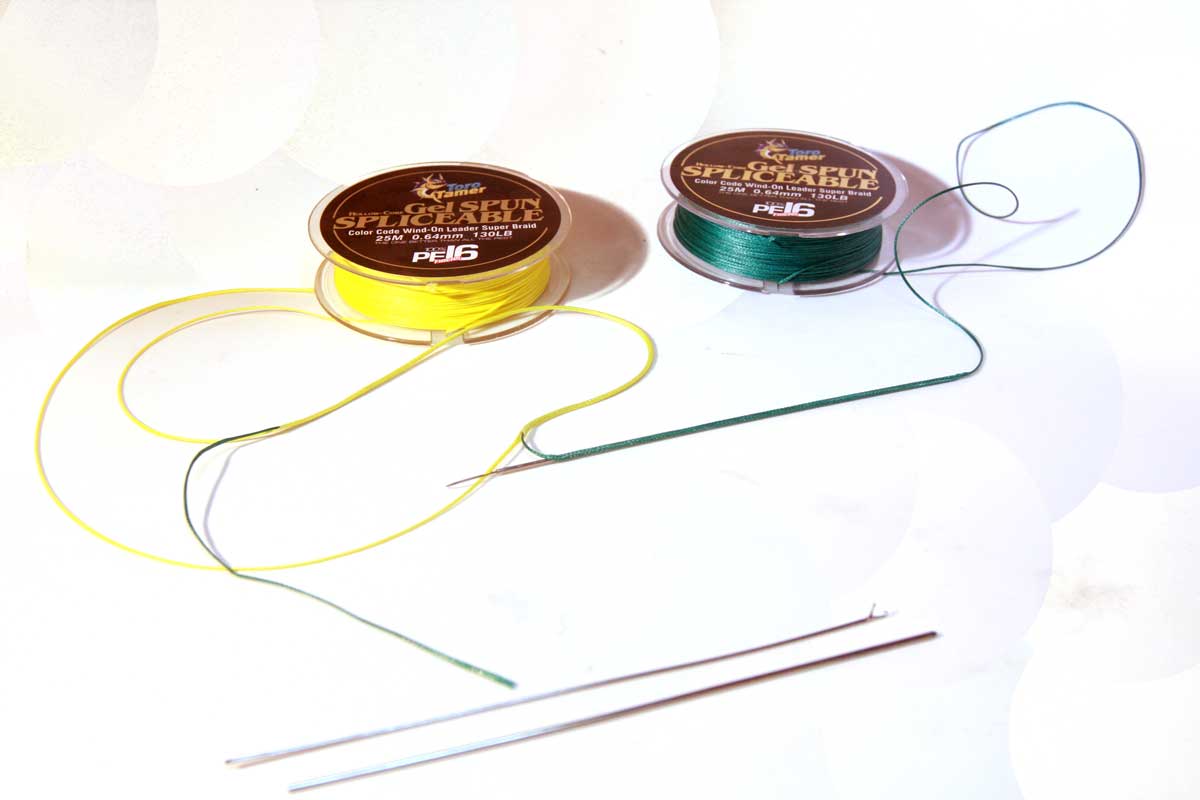
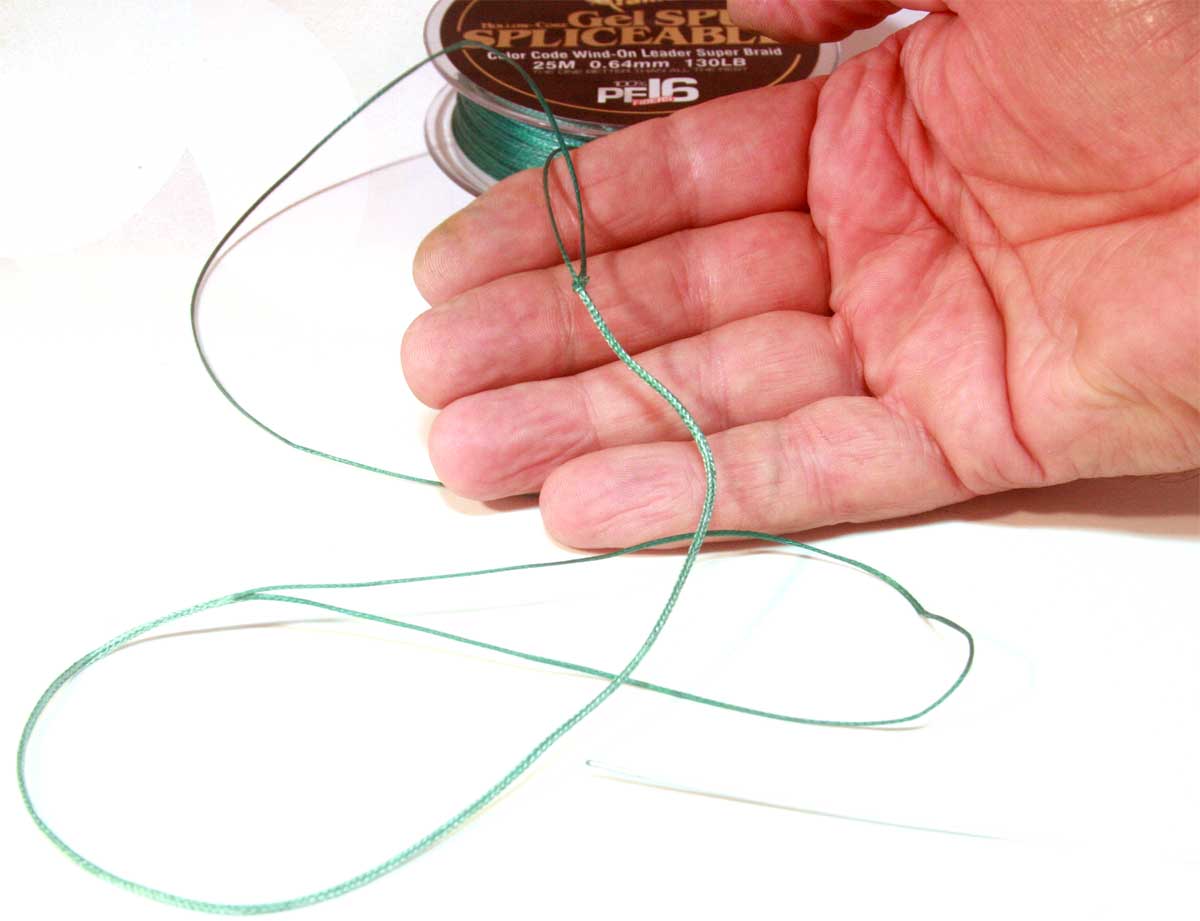
1
You will work with about
24-36 inches of each
line, inserting one
within the other 12-18
inches. Once you've
inserted the line using
your loop or latch
needle...
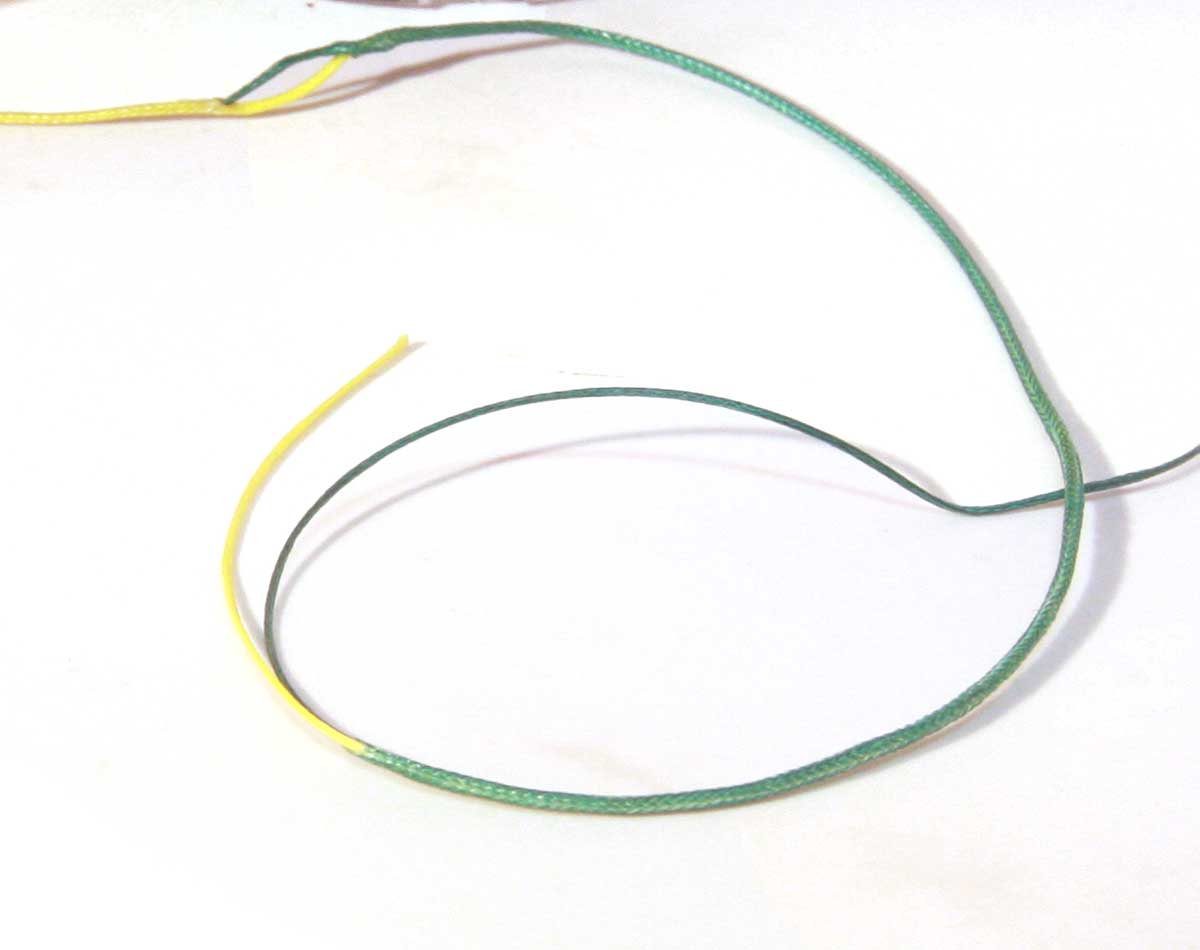
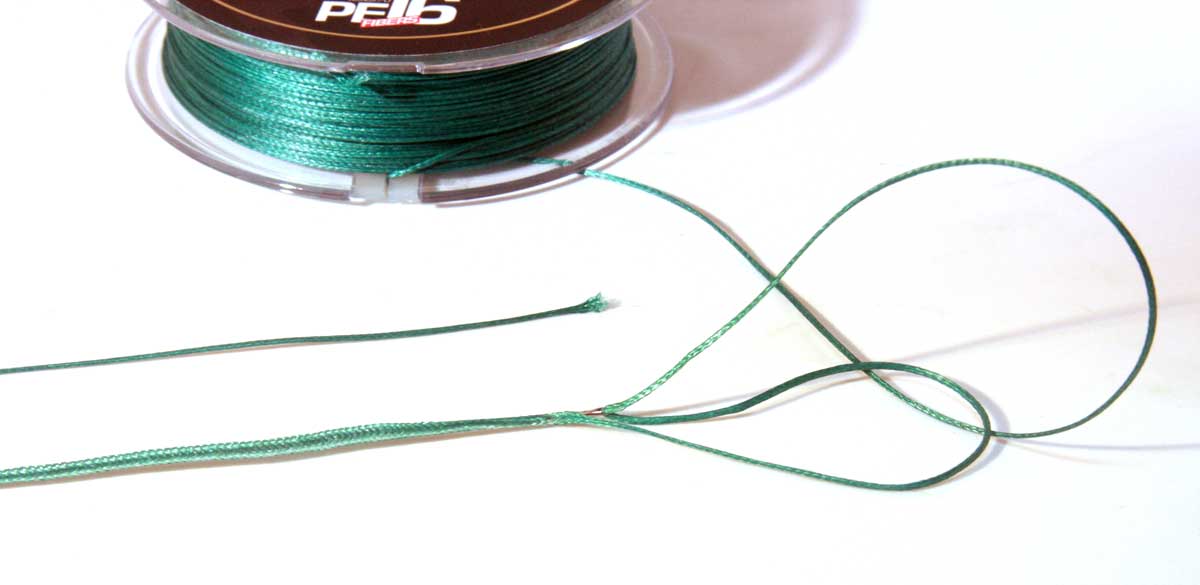
2
...bring the line out of
the braid and then go
back into the braid
about 1/4 to 1/2 inch
and bury your tag end of
the line back into the
hollow braid.
3
4
Once you've locked down
the splice by coming out
of the braid and back
inside you can smooth
over the "lock".
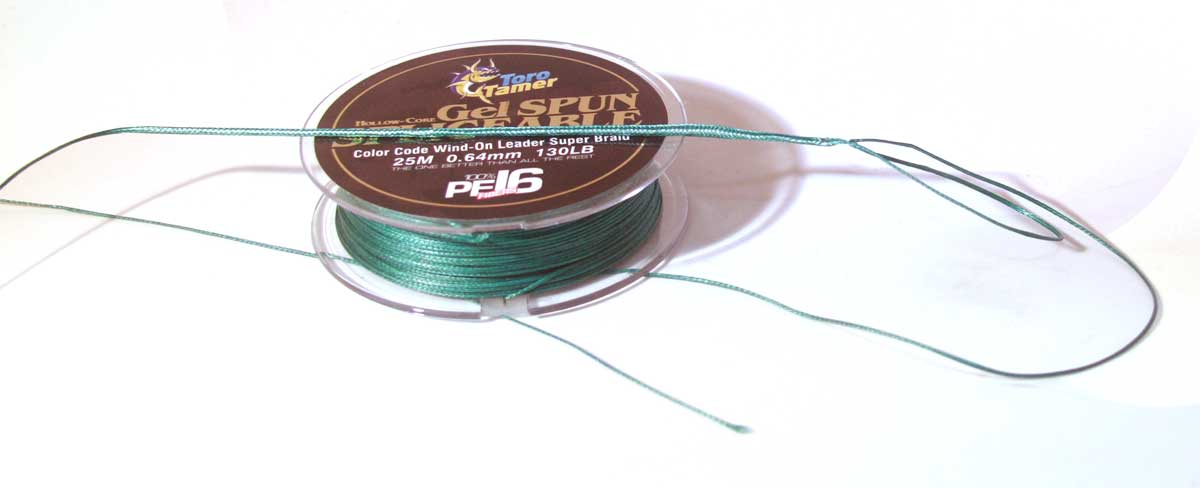
5
Repeat the procedure
with the other section
of line.
6
Lock down your tag ends
within the hollow braid
on both sides of the
splice.
7
8
9
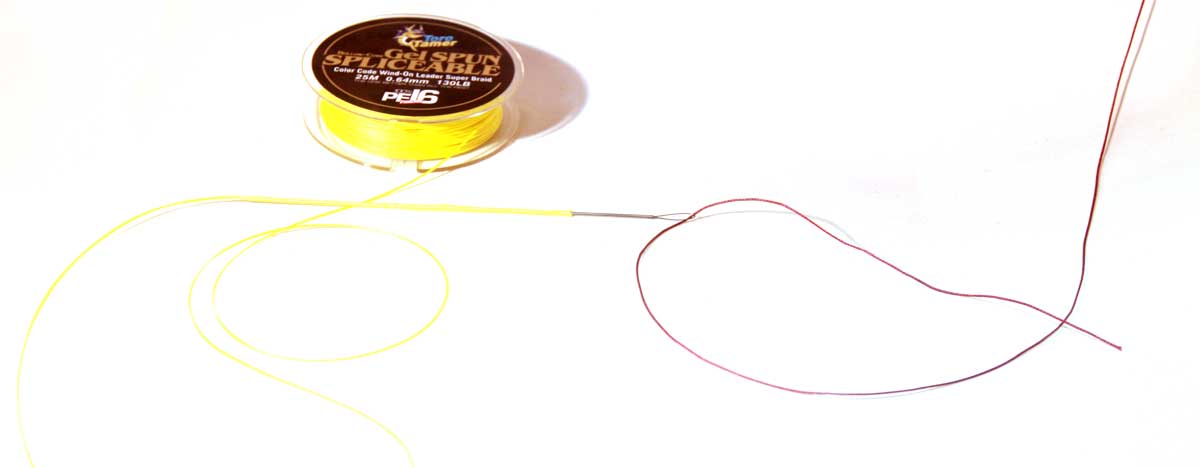
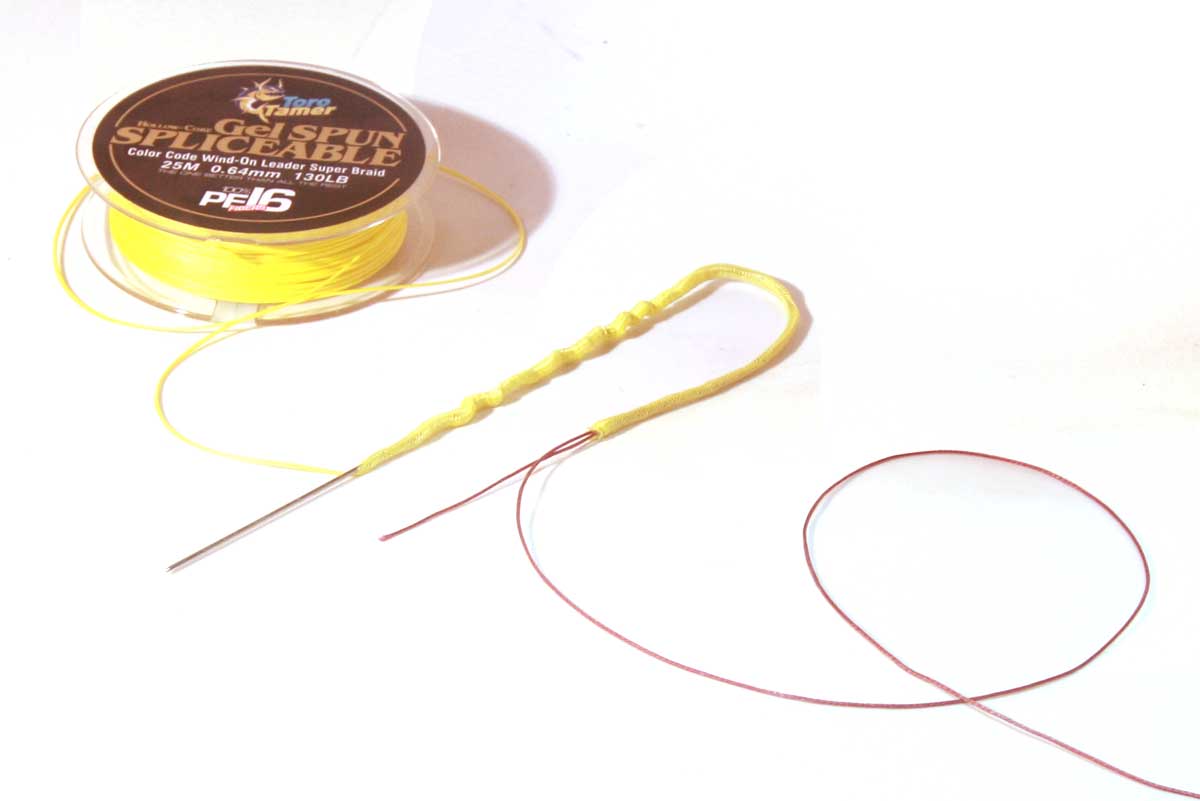
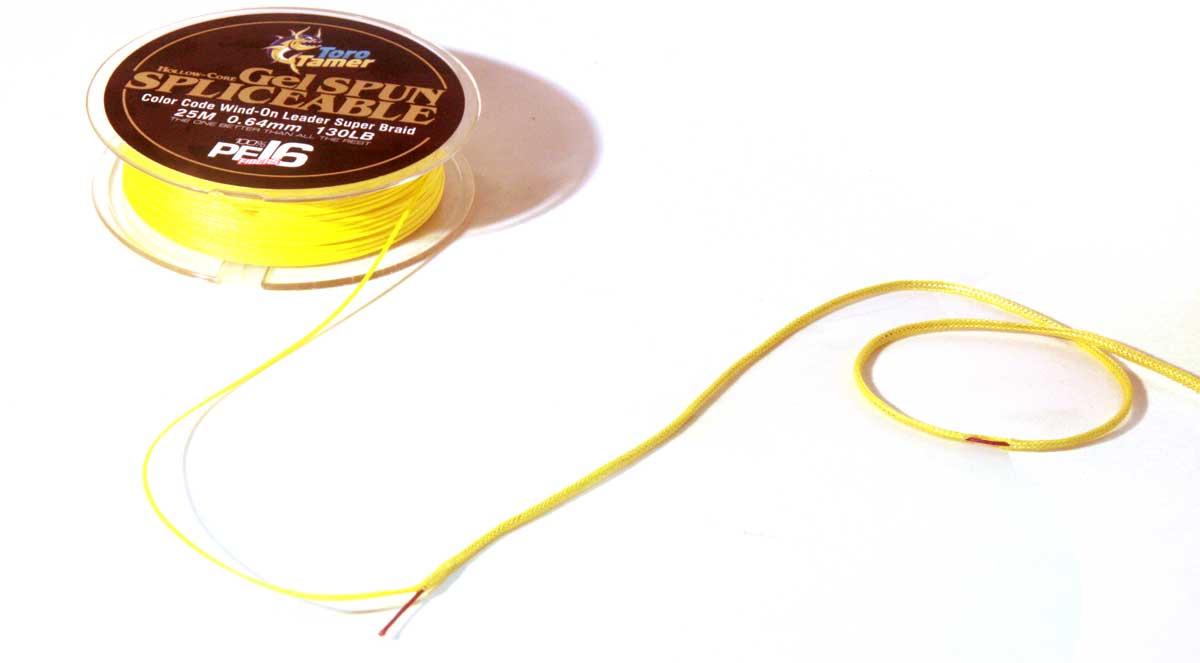
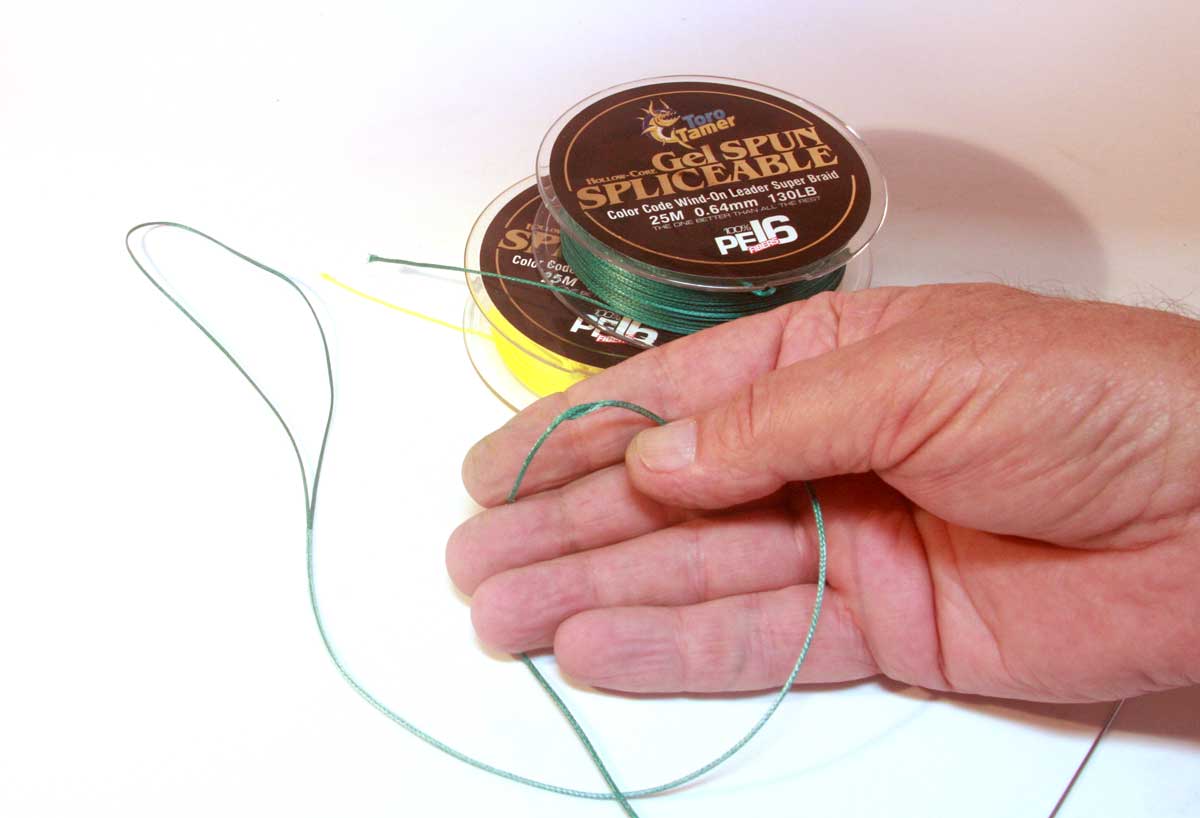
SOLID TO HOLLOW SPLICE CONNECTION
Loop or Latch
Needle Required
To connect solid to
hollow, similar
procedure as above.
Insert the "solid" line
into the hollow (in the
images below the red
line is solid while the
yellow line is hollow).
Insert the solid line
into the hollow a
minimum of 24 inches, I
will often go 3 feet.
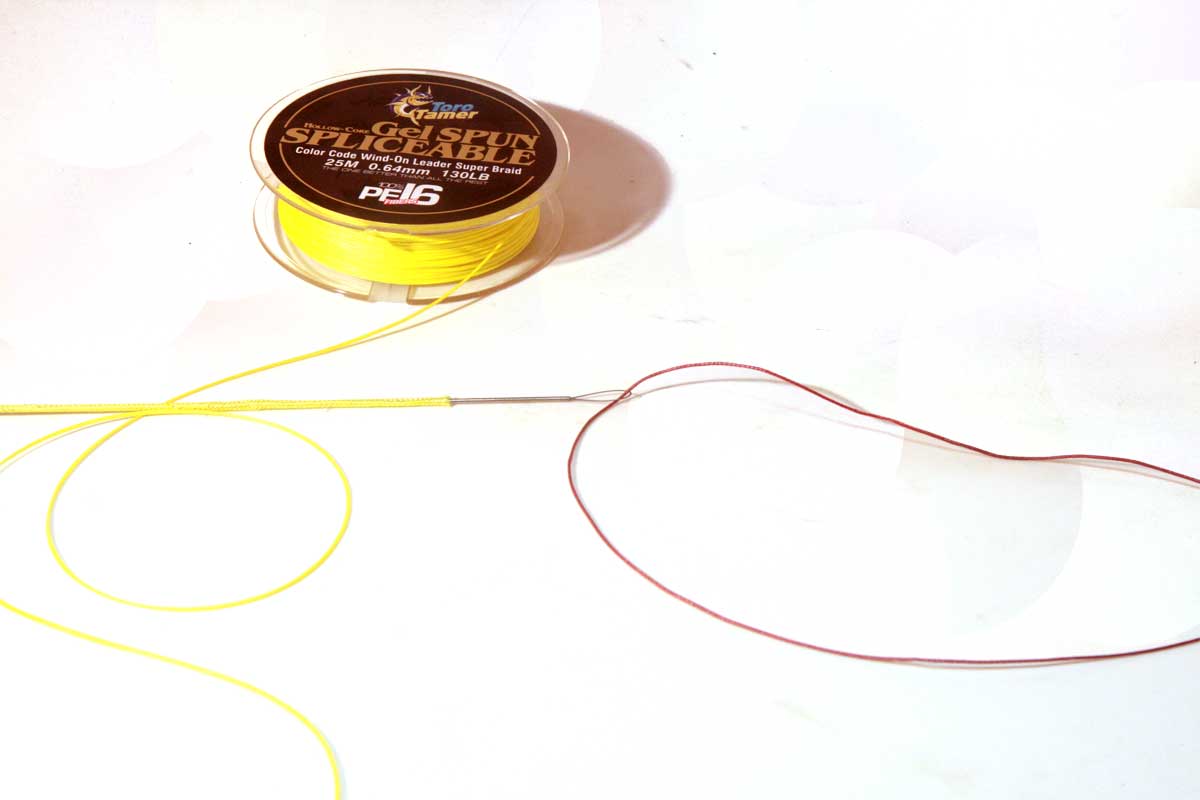
Then bring the solid
line out of the hollow
1/2" and re-insert into
the hollow and run it up
6-12 inches to lock it
down. I like to add a
nail knot to the
transition point, and/or
a touch of our Braid
Adhesive to minimize
line creep at the
transition point.
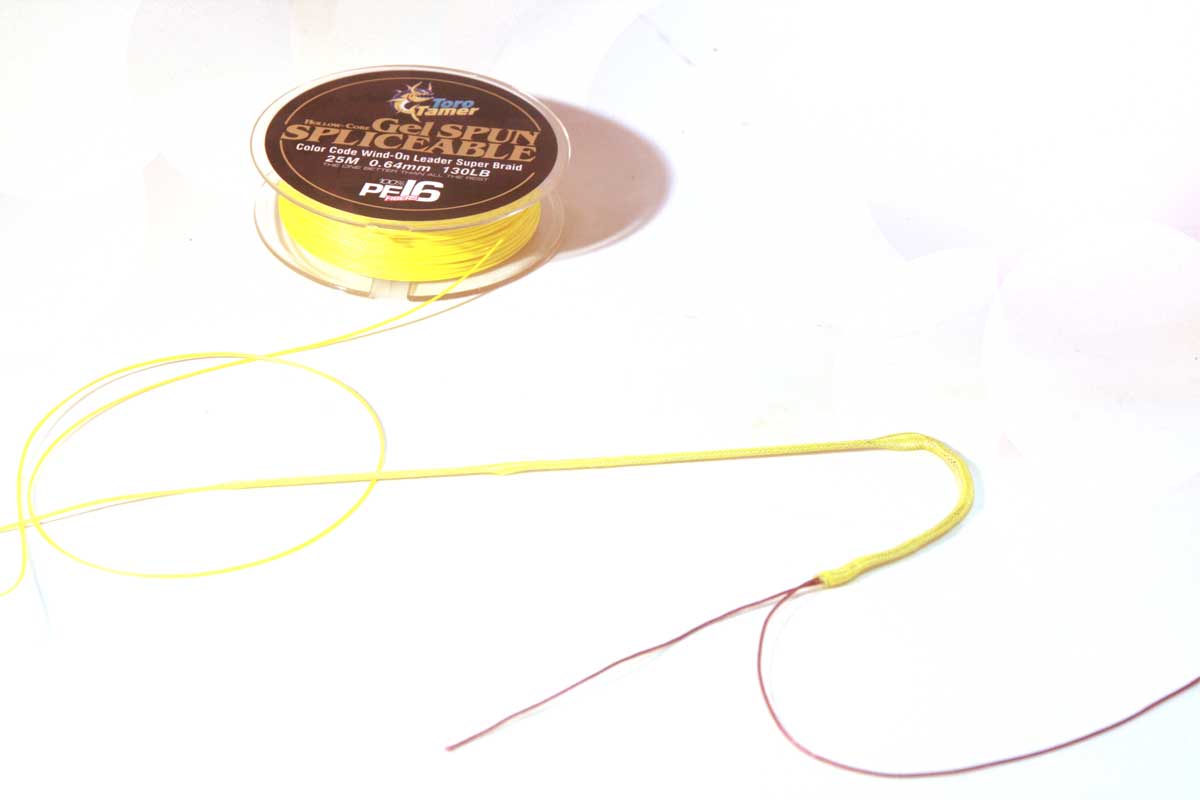
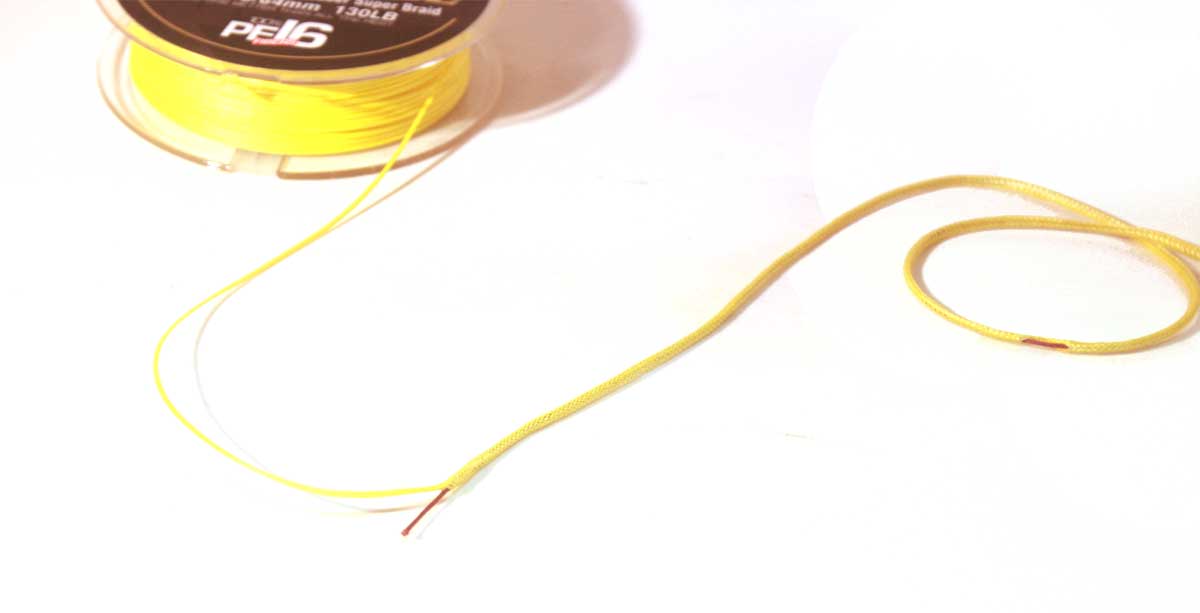
Insert the "solid" braid
within the hollow core
braid using either a
loop or latch needle.
Run the solid up into
the hollow 3 feet.
You will need 8-12
inches of "tag" end of
the solid to work with
once you exit the hollow
core line.
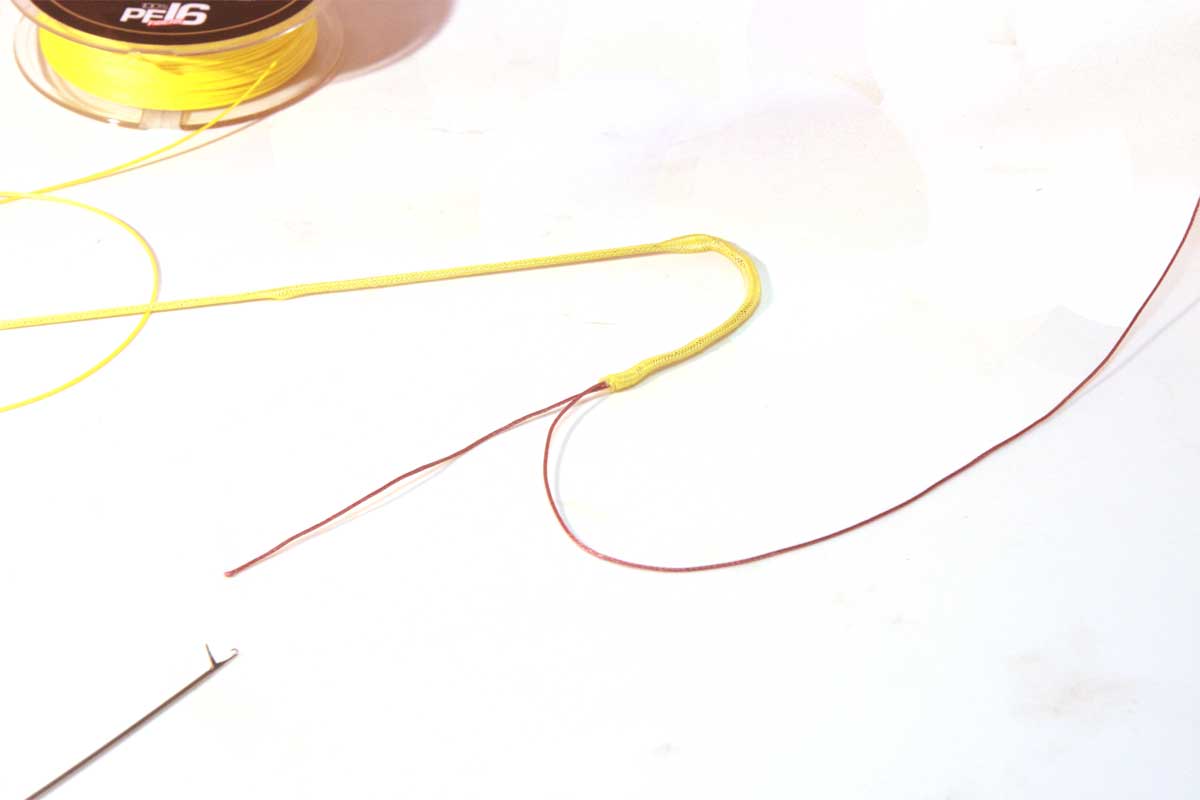
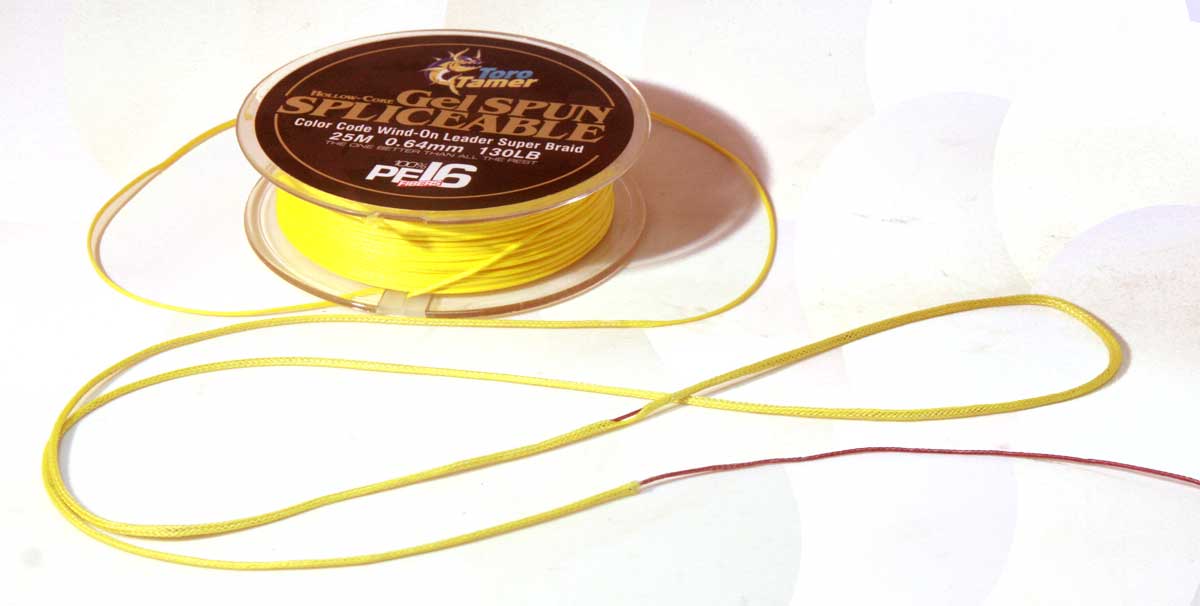
To prevent line slipage
you will re-insert the
tag end of the solid
braid back into the
hollow...
...leave 1/4 to 1/2 inch
gap between where you
exited the hollow and
reinsert the solid into
the hollow to the lock
down the line.
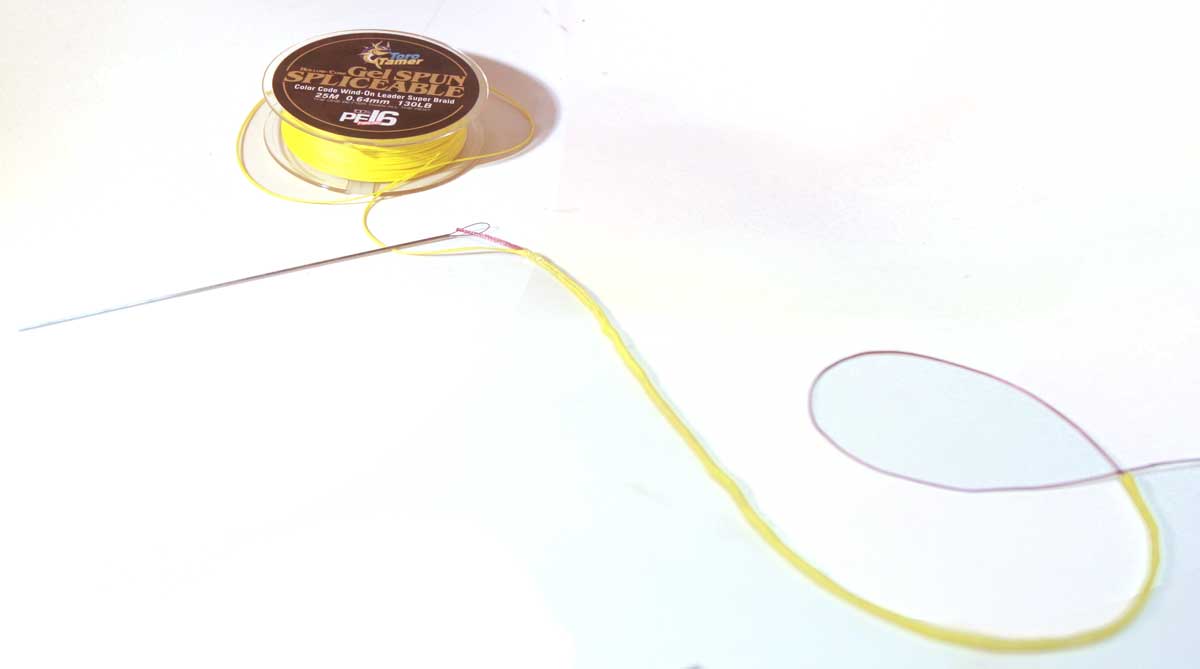
Now you have secured the
solid into the hollow
core. However you still
have the transition
point to deal with to
prevent the hollow braid
to slip at the
transition between the
two lines.
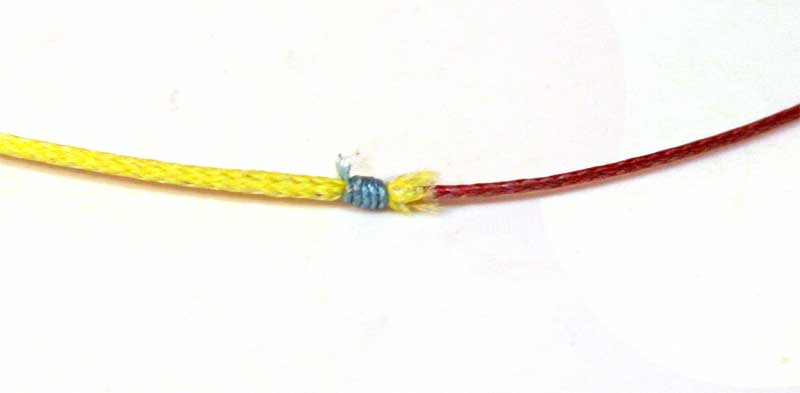
Some make use of two
"lock downs" one toward
the beginning of the
insertion and another
towards the end as
described.
Another variation is to
simply glue and/or make
use of a 7 turn nail
knot at the transition
point.
Once you've made the
nail knot apply some
Braid Adhesive.
MAKING A LOOP - USED FOR WIND-ON
LEADERS, MAKING ASSIST HOOKS, ETC.
Reverse Latch
Needle Used
Making a loop with
hollow braid is easy,
and is commonly done
when making use of
wind-on leaders which
allow quick change of
topshots. The loop is
also used on the wind-on
leaders themselves
allowing for loop to
loop connecting of
leaders. A loop made on
the reel's braid, loops
used on the wind-ons,
and for making assist
hook rigs for jigging
lures.
This is a very common
rigging technique for
heavier tackle targeting
cow size tuna, but also
increasingly common
among more sophisticated
anglers for their
shorter leader
fluorocarbon bait rigs
as an alternative to
simply rigging the
leader into the hollow
braid.
Start at a point
24-36 inches from the
end of the braid,
inserting the latch
needle into the hollow
braid, moving the point
of the needle towards
the end of the line.
Using the latch needle,
you will "latch" onto
the hollow and then pull
the line into the braid.
Do not run the line all
the way to the end of
the braid. Instead come
back out of the braid
about 12 inches from the
end of the line. You
will have a loop on the
braided line now. Next
you will want to pull
the braid (the outside
braided line) with the
tag end back over the
inserted line, much like
a sleeve being rolled up
your arm. The line
covering the inserted
line is now "inside
out." The final step
will be to lock down the
line. Using the tag end
of the braid, now 12-24
inches from your loop,
insert the tag end back
into the hollow braid
and run it up through
the hollow braid. Under
a pull this will help
lock down the line so
there's no slipping of
the loop.
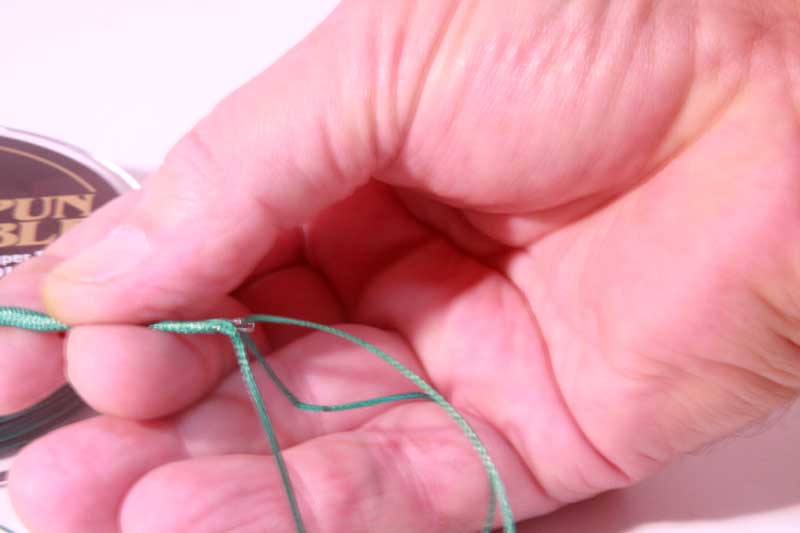
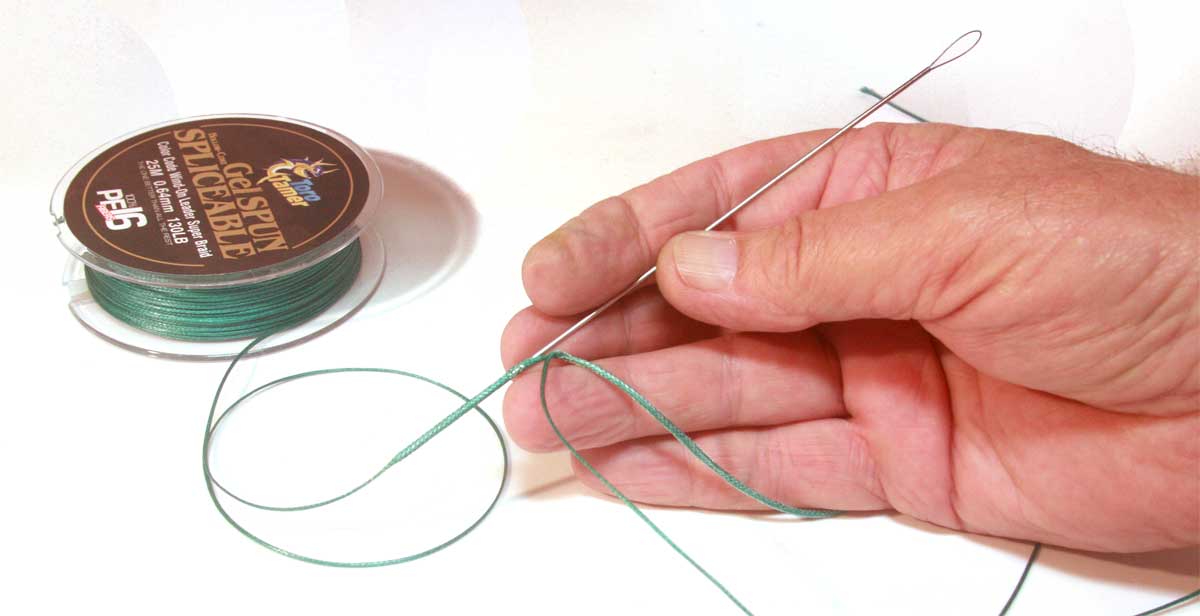
1
Begin at 24-36 inches
from the end of the hollow braid,
inserting the needle back towards
the end of the line.
2
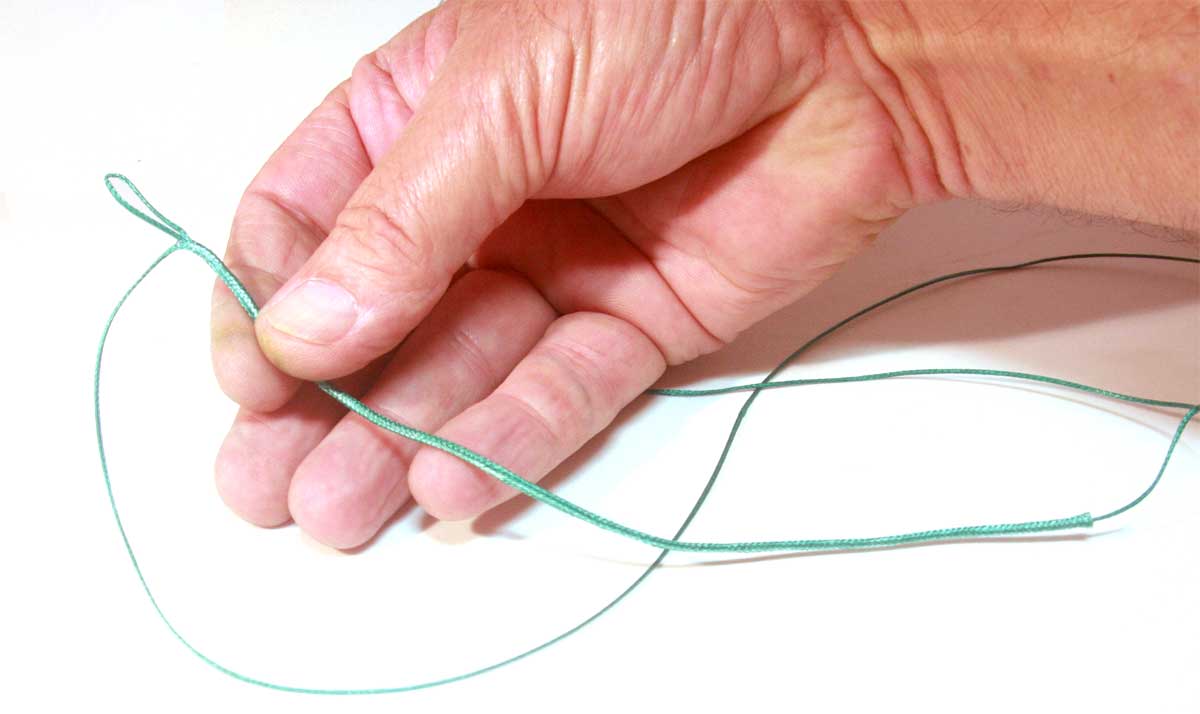
Make a loop and insert
that into the latch needle (or
loop), noting that the latch is
preferred for this operation.
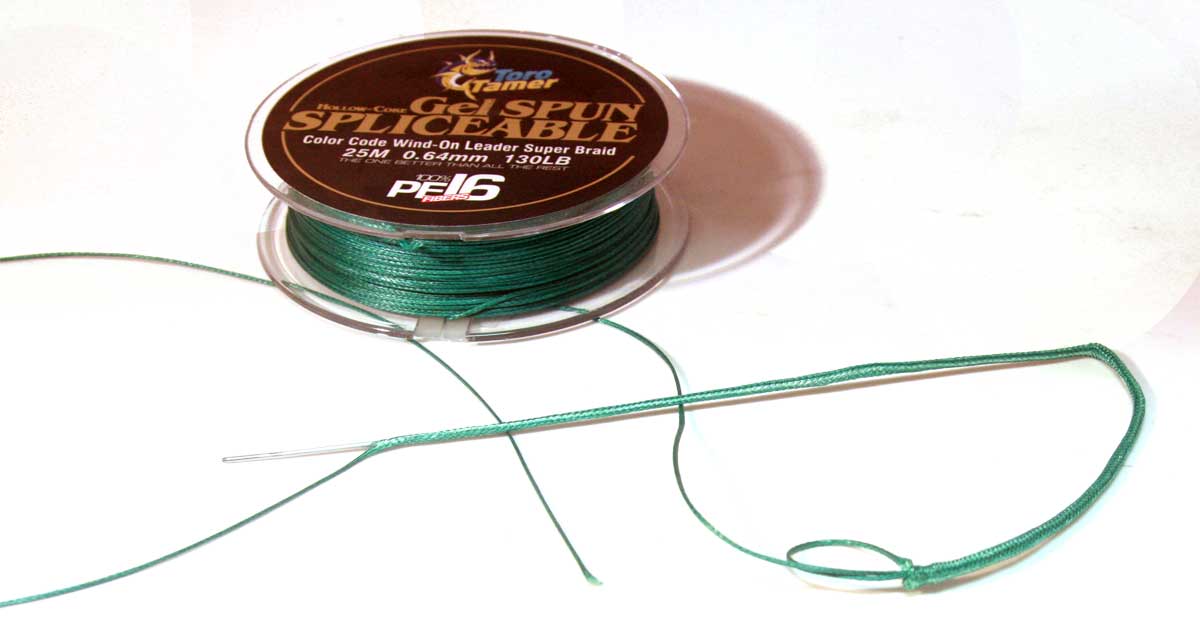
3
Run the line - with loop
- down into the hollow.
4
5
6
7
Exit
the hollow 24 or more
inches and about 8-12
inches from the end of
the braid.
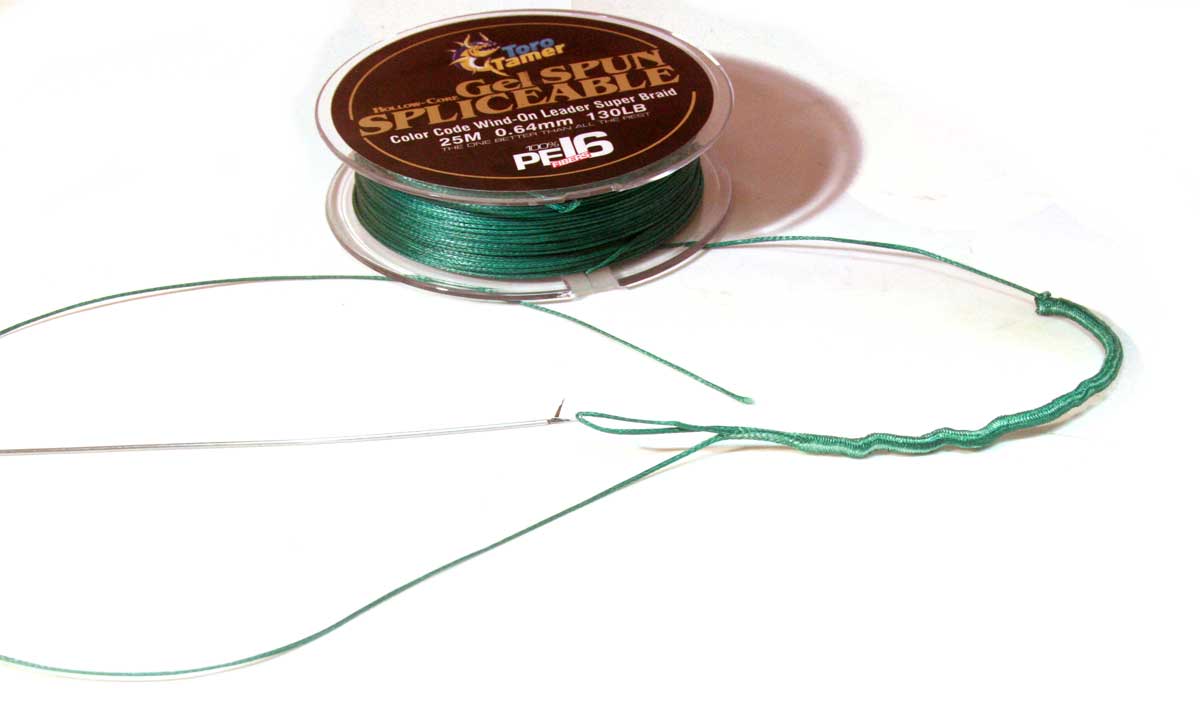
8
9
10
Note the tag end of the braid,
you'll make use of this to lock down
the line.
11
Now, slide the braid back over the
line with the loop.
12
You are turning the line inside out
as you bring it back over the
inserted line with loop.
13
14
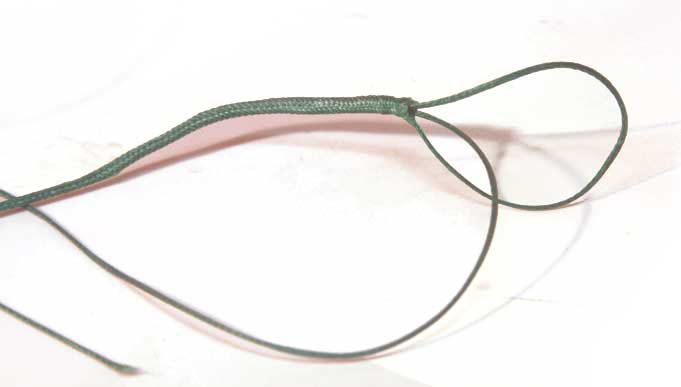
The final step is to
bury the tag end of the
line back into the
hollow braid.
15
Now you have locked down
the loop so that it
won't slip.
WIND-ON
LEADERS, FLY LINE RIGGING, MAKING ASSIST HOOKS, ETC.
Reverse Latch
Needle, Loop Needle,
Hollow Rigging Needle Used
Making your own Wind-On
leaders is economical
and often far better
than buying commercially
made wind-ons. They're
easy to rig with a bit
of practice and there
are several variations
on how to make these
useful rigs.
Dual Wall Wind-On
Leaders, long version...
Heavy Wind-Ons - long
version, covers nail
knots and serving
Loop Needle,
Hollow Rigging Needle Used
Megan demonstrates
rigging up hollow braid
as backing - without use
of bulky knots...